[INTRODUCTION] [CREATE / MAINTAIN ALBUMS] [SEARCH DATABASE] [PRINT REPORTS] [PERSONAL] [DESIGN REPORTS] [IMPORT ALBUMS] [MISCELLANEOUS]
Quick Start
Contents
|
|
Opening A Database 
Either click on the Open database ![]() button in the toolbar or select Open ... from the File
menu. A File requestor will open that shows the databases in the default
database folder. Click on a database (.dbk) then click on
the Select button.
button in the toolbar or select Open ... from the File
menu. A File requestor will open that shows the databases in the default
database folder. Click on a database (.dbk) then click on
the Select button.
Searching By Song 
To open the Album/Song Search window click on the Search ![]() button in the toolbar or select Album/Song Search from the Views
menu. When the window opens, select an artist from the artist drop-down
box or click on the By Song radio button. Immediately, a
list of songs will appear in the explorer list to the left of the window.
To view the details for any song, click on any song title and the details will
be shown in the right portion of the window.
button in the toolbar or select Album/Song Search from the Views
menu. When the window opens, select an artist from the artist drop-down
box or click on the By Song radio button. Immediately, a
list of songs will appear in the explorer list to the left of the window.
To view the details for any song, click on any song title and the details will
be shown in the right portion of the window.

Figure 1. Song details
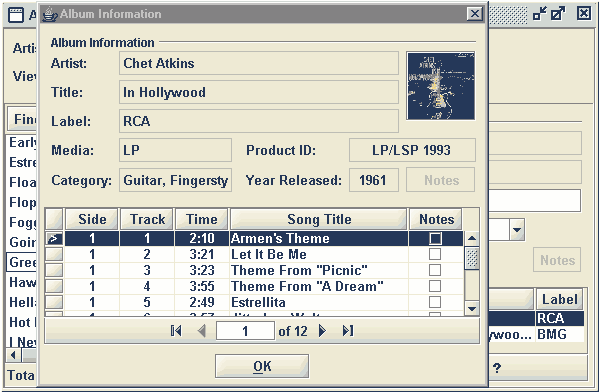
The table at the bottom shows all albums that contain the selected
song. To view the details of the album, highlight an album in the table,
then click on the More info ![]() button in the table
navigator. A second window will open showing the
details of that album.
button in the table
navigator. A second window will open showing the
details of that album.

Figure 2. Album detail from song search
There are two buttons on this window, Notes and Image. If the Notes button is active, then clicking on it will open another window displaying the notes. The same is true for the Image button, except it will open a window displaying the album cover image.
Searching By Album 
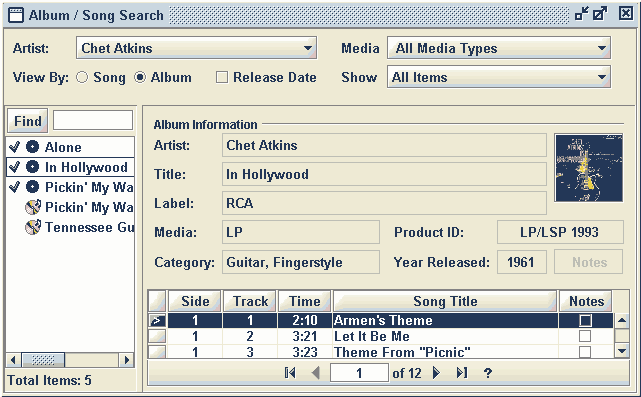
The steps are the same in an album search except the By Album button is clicked. A list of all albums for the selected artist is displayed in the explorer. Click on any album title and the album details are displayed in the right portion of the window.

Figure 3. Album details
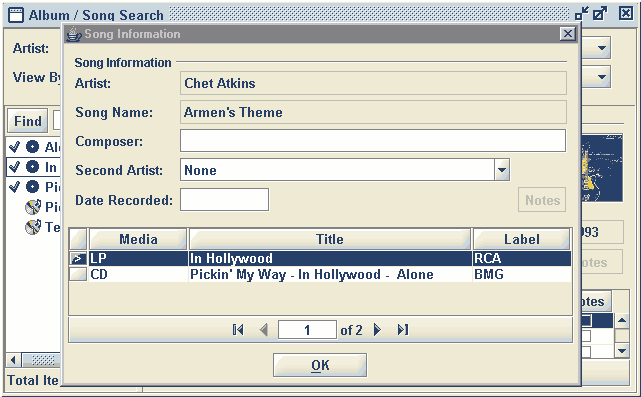
The table at the bottom of the album detail displays all songs contained in
the album. Highlight any song name, then click the More info
![]() button to show the song details as described above.
button to show the song details as described above.

Figure 4. Song detail from album search window
Creating A New Album 
Click the Album
Maintenance ![]() button or select Album Maintenance from the Views
Menu. The Add album
button or select Album Maintenance from the Views
Menu. The Add album ![]() button is inactive until a performer is selected in the Artist drop-down
box. Once the performer is selected, click the Add
album
button is inactive until a performer is selected in the Artist drop-down
box. Once the performer is selected, click the Add
album ![]() button and the right side of the window displays the Album Info
tab with defaults assigned.
button and the right side of the window displays the Album Info
tab with defaults assigned.

Figure 5. Song detail from album search window
Entering Album Info
Enter the appropriate information in the drop-down
boxes or text
boxes. All drop-down
boxes are auto-fill and will locate the first
matching item as you type. Often only the first 2-3 characters need to be
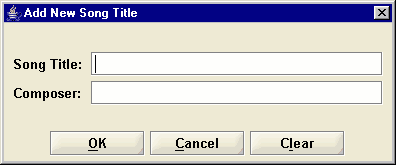
typed to locate a matching item. If a match can't be located, click the Add
![]() button to the right the drop-down
box. This will open a window where you can enter the appropriate
information.
button to the right the drop-down
box. This will open a window where you can enter the appropriate
information.

Figure 6. Typical data entry window
Enter the information in the proper text box and press enter to advance to the next text box. Proper case naming is applied to all information entered in the text boxes. For instance Your song, your song, and YOUR SONG will all be converted to Your Song. When done with the Album Info tab, click the Tracks tab to display the view for entering the album song tracks.
Entering Song Tracks
The Tracks view has the familiar drop-down boxes and text boxes for entering the song track information. The notable exception is the track table at the bottom of the view.

Figure 6. Add album tracks view
Before a song can be added, an empty row must be added to the track
table. If the song is one you know is not in the database, click the Add
new song ![]() button to the right of the Song Name drop-down
box. This will insert automatically add an empty row into the table.
Otherwise, click the Add row
button to the right of the Song Name drop-down
box. This will insert automatically add an empty row into the table.
Otherwise, click the Add row ![]() button in the table
navigator. It is often wise to initially add several empty rows at the
start. They can easily be deleted by clicking the Delete row
button in the table
navigator. It is often wise to initially add several empty rows at the
start. They can easily be deleted by clicking the Delete row
![]() button in the table
navigator. Once you have all the tracks entered, you may discover that
some of the songs are not in the proper order. To move a song up in the
table, click the Move row up
button in the table
navigator. Once you have all the tracks entered, you may discover that
some of the songs are not in the proper order. To move a song up in the
table, click the Move row up ![]() button in the table
navigator. To move a song down in the table, click the Move row
down
button in the table
navigator. To move a song down in the table, click the Move row
down ![]() button in the table
navigator.
button in the table
navigator.
Correcting Side-Track Information
As you enter songs, the track numbers are automatically sequenced.
However, they may be wrong. The recommended last step is to completely
re-sequence the tracks. First, click the Re-sequence all tracks
![]() button. This resets the side to 1 for all tracks and numbers the tracks
consecutively starting at 1. If there is only one side, Cd for instance,
then you are done. Otherwise, highlight the song for the start of side
2. Click into the Side text
box and press enter. The track numbers starting from the selected song
and below are re-numbered. again starting at 1. Repeat this process for
all additional sides.
button. This resets the side to 1 for all tracks and numbers the tracks
consecutively starting at 1. If there is only one side, Cd for instance,
then you are done. Otherwise, highlight the song for the start of side
2. Click into the Side text
box and press enter. The track numbers starting from the selected song
and below are re-numbered. again starting at 1. Repeat this process for
all additional sides.
At this point you are done. Clicking another song in the explorer or closing the window will save the data. You never have to remember to click a save button.
See the Creating and Maintaining Albums section of the documentation for more details. There you will find other ways to add song tracks (copying tracks from an existing album and importing from text files) and other useful tips.
Good luck and happy album creation !!!!